

Drone estimating starts with better roof information
A drone does not make the estimator irrelevant. It gives the estimator more proof to work from before, during, and after the roof walk.
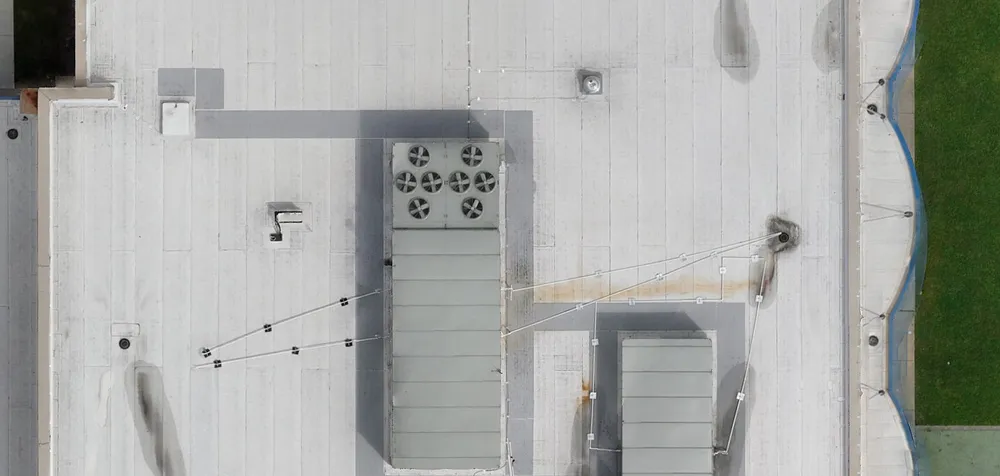
The useful estimating package is usually a combination: ortho , 3D model , source photos, measurements, and a clear way to get back to the roof context when a question comes up.
What each deliverable does
The ortho gives the estimator a flat roof map. The 3D model gives context around height, equipment, transitions, walls, and roof conditions. The source photos provide the evidence behind what the model and ortho show.
Measurements can help, but they should be handled honestly. Tolerances matter. Field verification still matters where the estimate or scope depends on a critical measurement.
- Ortho: flat, scaled roof view for markup and orientation.
- 3D model: height, walls, and equipment in context, plus photo navigation.
- Photos: evidence for conditions, details, and owner communication.
- Measurements: useful when the capture and processing support the decision.
How accurate are the measurements?
Here is the straight answer: I validated the workflow against taped roof measurements before relying on it for estimating. That does not make every model accurate or every surface measurable. The result depends on the capture, the reconstruction, the roof surface, and the measurement being made. What I will not do is promise survey-grade tolerances. I am not a licensed surveyor, and you should be suspicious of anyone who is not one but talks like one.
You do not have to trust the model blindly. Strip the texture off and look at the surfaces: where the reconstruction is clean, the geometry holds; where it is weak, you can see it. Reflective surfaces are where photogrammetry lies — metal and glass. I never trust a metal measurement off a model. Coping and panel depth get pulled by tape, because your crew is already up there.
If the reconstruction is clean but the scale is off, one known field measurement can correct that scale. It does not make weak reconstruction, metal, or glass trustworthy — those still stay with the field check.
I have run estimating takeoffs off these models for years, and the honest comparison is not the model against perfection — it is the model against me with a 100-foot tape and a wheel. The tape got distracted. The wheel got rushed. Human error shows up far more often than a capture process that has been vetted for eight years, and everything comes down to that capture.
What the drone doesn't capture
The flight does not end the roof walk, and it is not supposed to. Your crew still shoots the close-ups, still gets under the units where a drone cannot see, still pulls tape on coping and panel depth, still does the core cuts. That is not a gap in the tool — that is the standard: drone plus rooftop, every job.
Call it 85% of the roof information from the air, give or take. The rest is hands-on, and it always will be. What changes is what the estimate leans on afterward: less memory, fewer scribbled notes — hard imagery, organized in one place.
Think about what a cell phone did for your team. It did not replace anyone. It made everyone reachable, made every condition photographable, made every conversation faster. The drone is the same kind of tool — it enhances the crew you already trust.
Where it speeds up the work
The speed comes from fewer unknowns and fewer return trips. The estimator can review the roof from one place, defend the scope with visual proof, and bring better context into the normal estimating workflow.
This is why Roofing in 3D is built as a program. One drone flight helps. A repeatable capture and processing standard helps your team improve job after job.
Where it does not replace the estimator
The estimator still decides the scope, assemblies, waste, access, labor assumptions, risk, exclusions, and final number. The drone package helps them see more of the roof and defend the story behind the estimate.
That distinction matters. If the drone workflow is sold as a button that creates an estimate, the team will either distrust it or misuse it. If it is sold as better roof information, it fits the way commercial roofing already works.
A practical bid-day example
A production estimator can use the ortho to orient the roof areas, review the model for walls and height changes, pull source photos for condition evidence, and flag the spots that still need field verification. The package does not remove judgment; it reduces blind spots.
When a scope question comes back later, the same package gives the team a shared reference instead of a memory test: where was that curb, what did the drain look like, how much traffic was around that unit, and what did the edge condition show?
- Use the ortho for roof layout, markup, and section context.
- Use the model to understand transitions, equipment, walls, and access.
- Use photos to defend conditions and owner-facing explanations.
- Use field verification where the scope depends on a critical detail.